


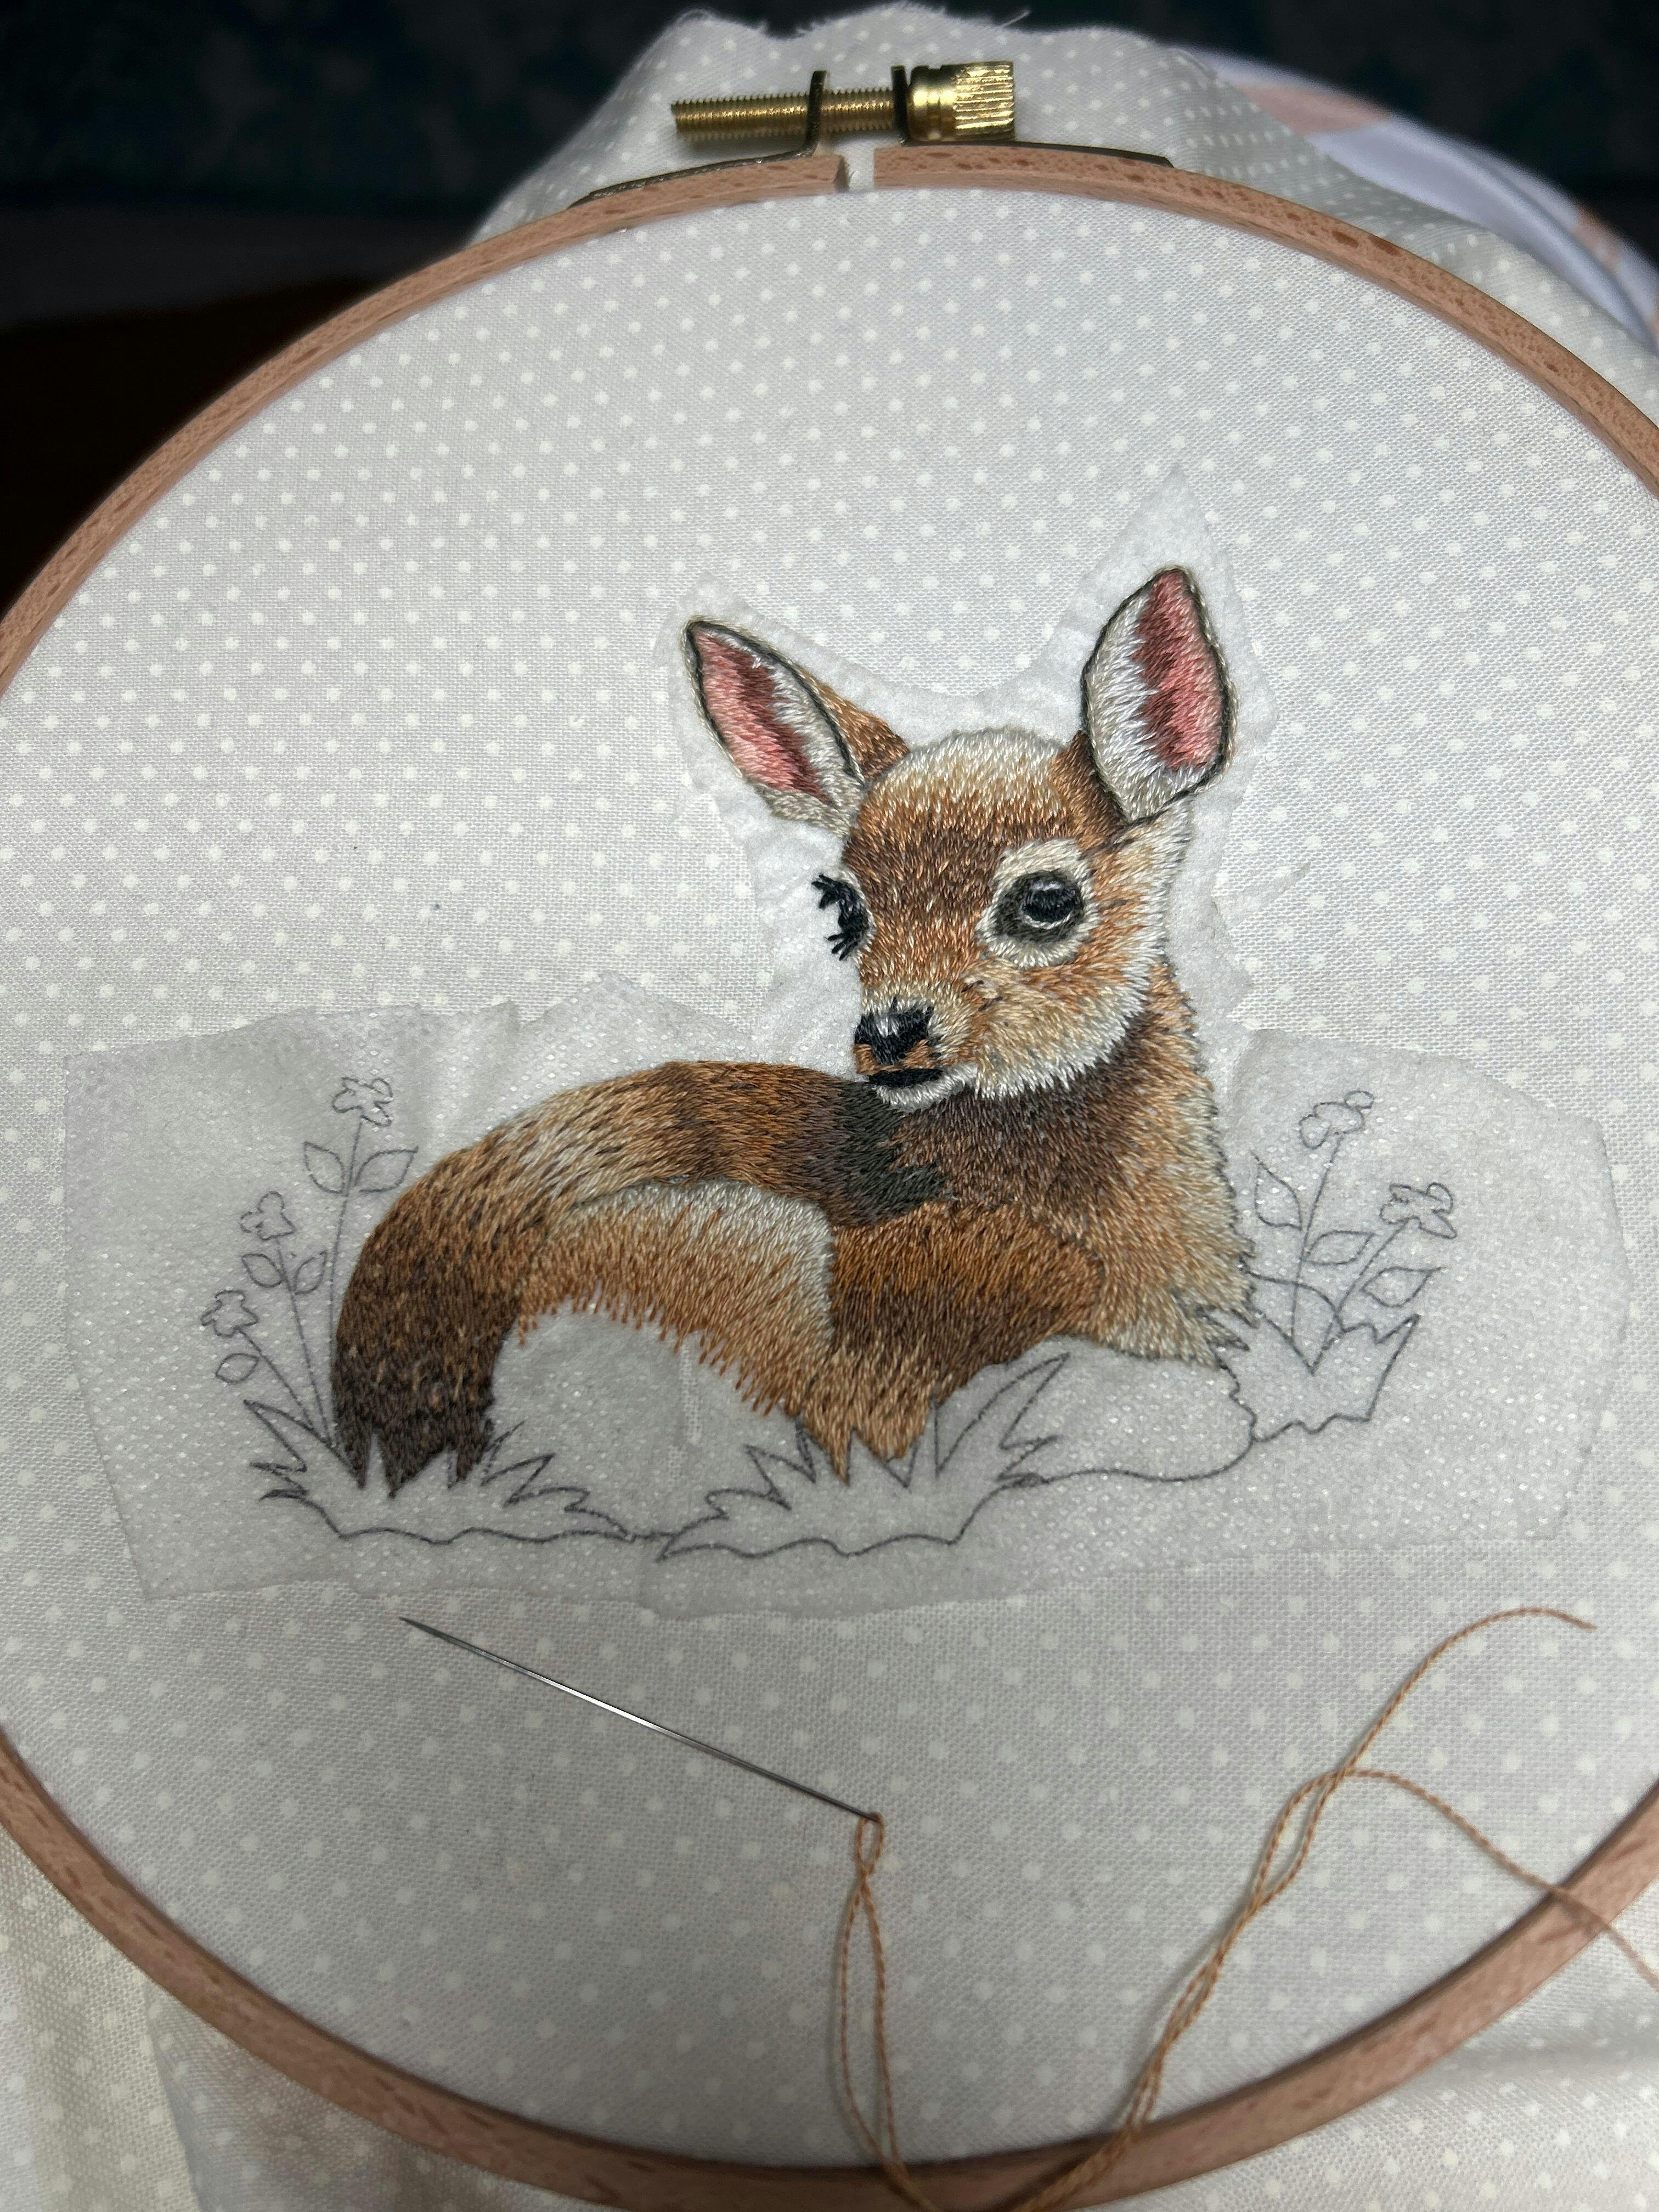
FAWN Learn how to stitch a woodland animal
In this Woodland Animal series you will learn how to create your own animal portrait from a photo or image, how to trace the outline from the original and how to stitch the different features, eyes, fur etc. You will be shown how to direct your stitches to fit the different elements of an animal. We will also discuss the importance of shading to achieve more depth in your embroidery and why we use certain stitches for different areas of a design. Once you have completed this project you will have gained the confidence to design and stitch your own woodland animal.
Using this embroidery project as a reference, you will learn how to create your own woodland animals in Needlepainting embroidery.
In this masterclass you will learn:
-
How to trace the outline from the original photo or image
-
How to stitch the different features, eyes, ears, hair etc.
-
How to direct your stitches to fit the different elements of the animal.
-
How to shade the features to achieve a realistic effect.
-
How to use different stitches to obtain the most realistic effect.
PDF pattern for instant download, no shipping required. You are buying a digital file to download, save and view/print at home.
Skill level: LEVEL INTERMEDIATE - some previous experience required.
Project Size: 13.5 x 11.5cm (5.3 x 4.5in)
You will receive
- One PDF Pattern with instructions: How to stitch a woodland animal - 18 pages.
- New comprehensive Stitch guide - 31 pages.
- A full list of threads and materials required.
- Clear tracing outline actual size.
You will need
- Fabric
- Thread
- Needles
- Hoop
Iron on transfer pack for this project.
Adobe Acrobat Reader is required to preview and store this pattern.
Customer Reviews
At last I have completed the Fawn and the Fox after a few interruptions. I have so enjoyed these new challenges doing something entirely different.I have all your books and have done all thr projects from your Kew books. I have tried other down loads from other companies but nobody is as good as you. Could you do a pattern for a badger and an English kingfisher please
I have learned so much about color blending and direction/movement from this course. I love my fawn! She is not done, and I made a few (not intentional 🫢)changes by not reading carefully, but I am in love with her!
Trish Burr’s work is inspiring. I strive to absorb every tip and improve my skills each time I pick up my needle.
Impatiente de le commencer. Les explications sont claires, bien détaillées avec les photos idéales. Un grand merci pour nous proposer de superbes créations à faire.
Nathalie
A delightful project. You do the eyes first so this adorable creatures stares at you thru the entire project. I love all of her "stuff". I have completed over 50 of her incredible paintings. Very talented, kind lady that is willing to share so much. Love you Trish.
Love you too Karen. Thank you for being such an amazing customer and friend. Trish